
Introduction: The Ultimate Dessert Experience
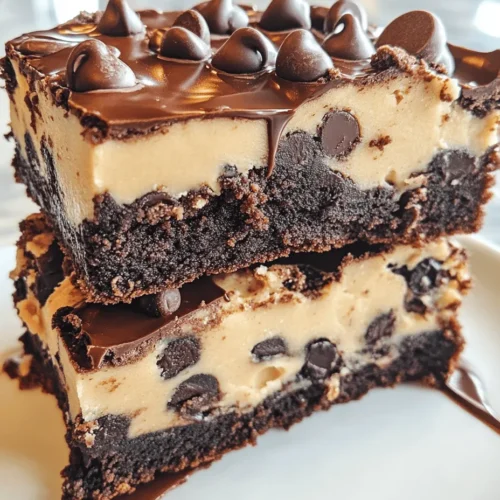
In the world of desserts, few combinations can rival the rich, decadent delight of browkies. What are browkies, you ask? They are the perfect fusion of two beloved treats: brownies and cookies. Imagine sinking your teeth into a chewy chocolate cookie with a fudgy brownie base. The texture is an indulgent blend of soft, chewy, and melt-in-your-mouth goodness that makes every bite a heavenly experience.
Browkies have gained significant popularity among dessert enthusiasts, and it’s easy to see why. The appeal lies not only in their delightful duality but also in the versatility they offer. Whether you’re a fan of classic chocolate flavors or prefer a sprinkle of sea salt to enhance the sweetness, browkies can cater to a wide range of tastes. This article aims to be your comprehensive guide to making the perfect browkies at home, ensuring you can recreate that bakery-style experience in your own kitchen.
Understanding Browkies: A Delicious Hybrid
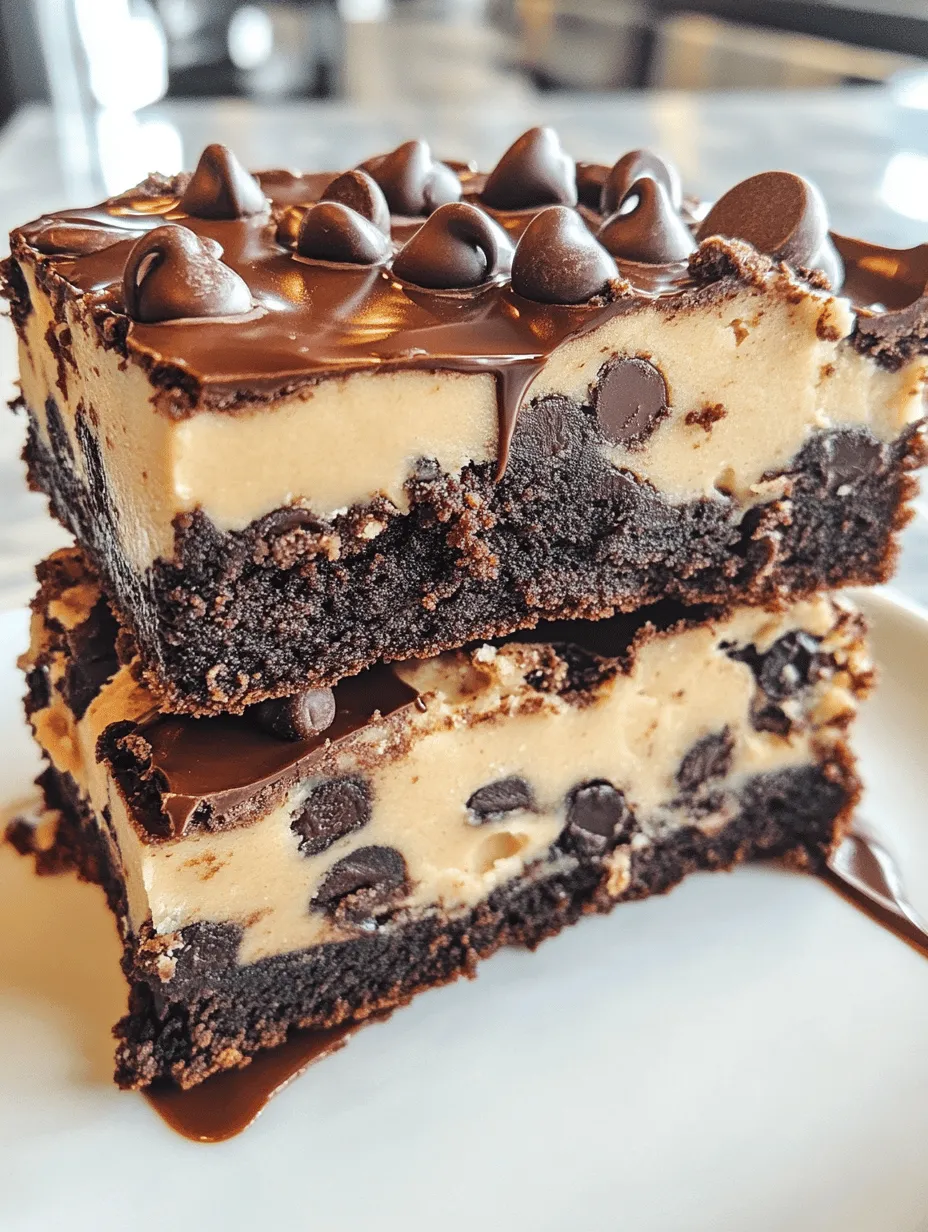
Browkies can be defined as a delectable hybrid dessert that combines the dense, fudgy characteristics of brownies with the soft and chewy textures of cookies. This innovative dessert has taken the culinary world by storm, captivating the hearts and taste buds of many. The history of browkies is relatively recent, emerging as a creative solution for those who simply could not choose between a cookie or a brownie. As a result, bakers began experimenting with recipes, ultimately leading to the delightful treat we now know as browkies.
The beauty of browkies lies in their ability to appeal to a diverse audience. Chocolate lovers find their cravings satisfied with the rich chocolate base of the brownie layer, while those who appreciate the classic cookie experience can enjoy the delightful chewiness of the cookie top. It’s a dessert that brings people together, making it a perfect choice for gatherings, parties, or even a cozy night in.
Ingredients Breakdown: What You Need for Browkies
Creating the perfect browkies starts with understanding the essential ingredients that come together to form this delicious dessert. Each layer has its unique components, contributing to the overall flavor and texture of the final product. Below, we’ll break down the ingredients needed for both the brownie and cookie layers.
Brownie Layer Ingredients:
1. Unsalted Butter: The foundation of a fudgy brownie is high-quality unsalted butter. The fat content helps create that rich, dense texture we all crave. Using unsalted butter allows you to control the saltiness of your dessert, ensuring a perfectly balanced flavor.
2. Granulated Sugar: This ingredient is vital for sweetness and contributes to the desired chewy texture. The granulated sugar melts during baking, helping to create a shiny, crackly top that is characteristic of brownies.
3. Brown Sugar: Using brown sugar not only adds sweetness but also introduces a hint of caramel flavor, enhancing the overall richness of the browkies. It retains moisture better than granulated sugar, resulting in a fudgier texture.
4. Cocoa Powder: For that intense chocolate flavor, cocoa powder is essential. It’s what gives the brownie layer its deep color and rich taste. Opt for high-quality cocoa powder to achieve the best results.
5. Eggs: Eggs serve as a binding agent and provide structure to the brownie layer. They also contribute to the moistness and fudgy texture that browkies are known for.
6. All-Purpose Flour: The flour acts as the backbone of the brownie layer, giving it stability. However, be cautious not to overmix after adding the flour to avoid a cakey texture.
7. Vanilla Extract: A splash of vanilla extract enhances the flavor profile of the brownies, adding depth to the chocolate taste.
8. Salt: A pinch of salt is crucial in balancing the sweetness and bringing forward the flavors of the chocolate.
Cookie Layer Ingredients:
1. Unsalted Butter: Just like in the brownie layer, unsalted butter is key to achieving a soft and chewy cookie layer. It should be at room temperature for easy creaming with sugars.
2. Granulated Sugar: This ingredient sweetens the cookie layer and contributes to its chewy texture.
3. Brown Sugar: The use of brown sugar in the cookie layer not only sweetens but also adds moisture, making the cookies soft and chewy.
4. Egg: Similar to the brownie layer, an egg in the cookie dough serves as a binding agent and helps achieve that desired chewy texture.
5. All-Purpose Flour: Flour provides the necessary structure to the cookies. As with the brownie layer, avoid overmixing to keep them from becoming too dense.
6. Baking Soda: This leavening agent is crucial for achieving the perfect rise in the cookie layer, ensuring they are light and fluffy.
7. Chocolate Chips: The star of the cookie layer, chocolate chips add bursts of chocolatey goodness. You can choose between semi-sweet, dark, or even milk chocolate, depending on your preference.
8. Vanilla Extract: Once again, vanilla extract plays a role in enhancing the overall flavor of the cookies.
9. Salt: A sprinkle of salt in the cookie layer balances the sweetness and enhances the chocolate flavor.
Preparation Steps: Crafting the Perfect Browkies
Creating browkies is a straightforward yet rewarding process. The key is to follow the steps carefully and pay attention to details to ensure the best results. Here’s how to get started.
Preheat the Oven: Setting the Stage for Baking
The first step in making browkies is to preheat your oven to 350°F (175°C). Preheating is crucial because it allows for even baking, ensuring that your browkies turn out perfectly cooked throughout. An oven thermometer can be useful if you want to ensure the temperature is just right, as even a slight variation can impact the final texture of your dessert.
Creating the Brownie Layer: Step-by-Step Process
1. Melt the Butter: Begin by melting your unsalted butter in a medium saucepan over low heat. Alternatively, you can use a microwave-safe bowl and microwave it in short bursts, stirring in between until fully melted. Allow the melted butter to cool slightly.
2. Mix in Sugars: In a large mixing bowl, combine the melted butter with granulated sugar and brown sugar. Mix well until the sugars are fully incorporated and the mixture is smooth. This step is key to achieving that shiny top layer on your brownies.
3. Add Eggs and Vanilla: Next, add in the eggs one at a time, mixing well after each addition. Then, stir in the vanilla extract, ensuring everything is well combined.
4. Combine Dry Ingredients: In a separate bowl, whisk together the cocoa powder, flour, and salt. Gradually add the dry mixture into the wet ingredients, folding gently until just combined. Be careful not to overmix; you want to maintain that fudgy texture.
Making the Cookie Layer: A Fluffy Delight
1. Cream the Butter and Sugars: In a separate mixing bowl, cream together the unsalted butter, granulated sugar, and brown sugar until the mixture is light and fluffy. This typically takes about 2-3 minutes with an electric mixer. The creaming process introduces air into the dough, which is essential for light, fluffy cookies.
2. Add the Egg and Vanilla: Beat in the egg and vanilla extract, mixing until well combined. The mixture should appear smooth and creamy.
3. Combine Dry Ingredients: In another bowl, whisk together the flour, baking soda, and salt. Gradually add this dry mixture to the wet ingredients, stirring until just combined. Again, be cautious not to overmix.
4. Fold in Chocolate Chips: Gently fold in the chocolate chips, ensuring they are evenly distributed throughout the cookie dough.
With both layers prepared, you’re now ready to combine them and bake your browkies to perfection. Stay tuned for the final steps in the upcoming section, where we will guide you through the assembly and baking process that will lead to the ultimate dessert experience.
Incorporating dry ingredients into a dough is a crucial step that can significantly affect the final texture and flavor of your browkies. When adding flour, cocoa powder, and other dry components, it’s essential to do so gently. Overworking the dough can result in tough, dry browkies instead of the desired chewy and fudgy consistency. Aim to mix until just combined; a few flour streaks are acceptable, as they will integrate during the baking process. This method ensures that the gluten in the flour does not develop too much, keeping your browkies tender and soft.
Assembling the Browkies: Layering for Success
Now that you have your brownie and cookie dough ready, it’s time to assemble your browkies. The layering process is where the magic happens, creating that delightful contrast between the fudgy brownie base and the chewy cookie top.
1. Lining the Baking Pan: Start by greasing a baking pan (preferably 9×13 inches) or lining it with parchment paper for easy removal. This step is crucial for preventing your browkies from sticking and ensures a clean edge.
2. Creating the Brownie Layer: Pour the brownie batter into the prepared pan, spreading it evenly with a spatula. Make sure it reaches the corners and forms a uniform layer. This will serve as the foundation for your browkies.
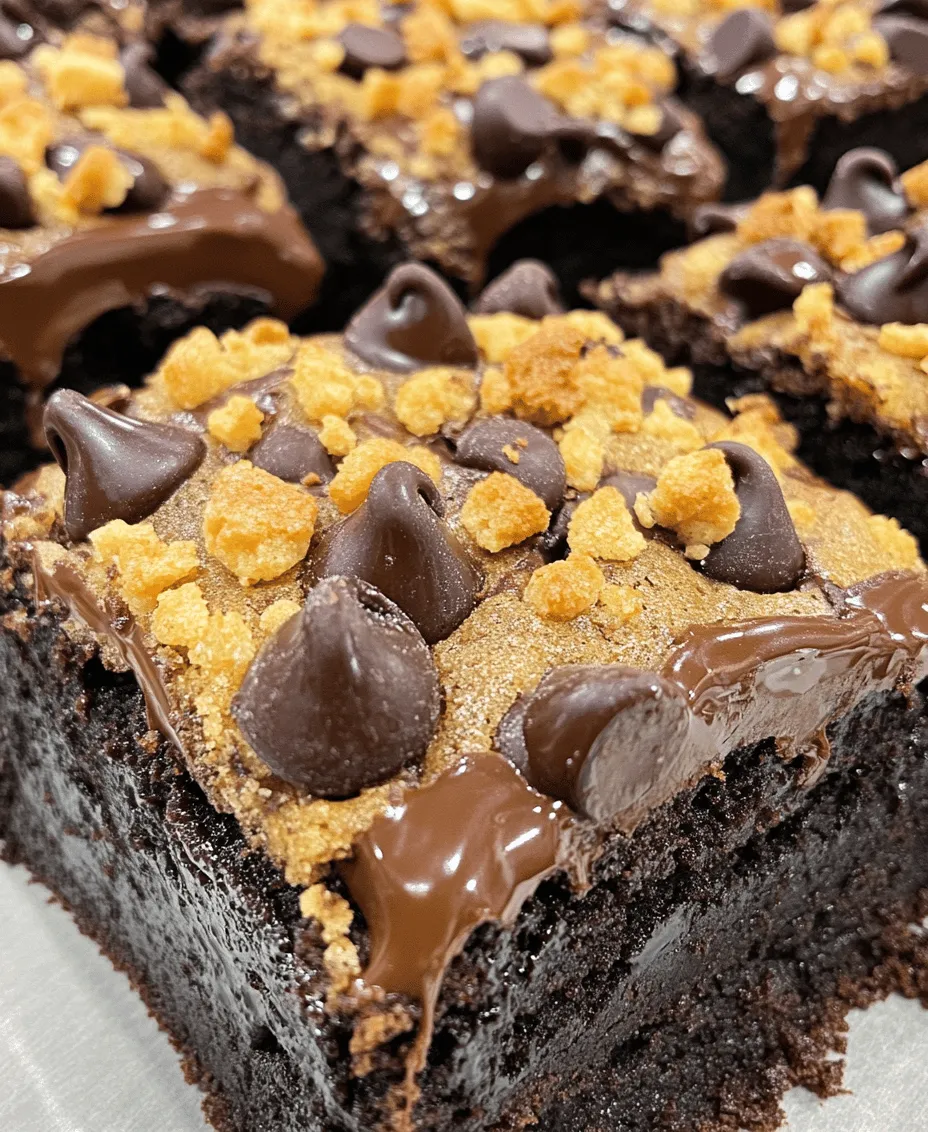
3. Distributing the Cookie Dough: Now, take your cookie dough and drop spoonfuls over the brownie layer. Instead of spreading it out completely, leave some space between the dough blobs to allow for spreading during baking. This technique helps create a beautiful, marbled effect once baked.
4. Even Distribution: Use the back of a spatula or your fingers to gently press the cookie dough down, but avoid mixing it with the brownie layer. The goal is to have a distinct brownie base topped with a generous layer of cookie dough.
Baking Your Browkies: Timing and Techniques
Baking is a science, and timing is everything when it comes to achieving perfectly chewy browkies. Here’s what you need to keep in mind:
1. Baking Process: Ensuring Perfectly Chewy Browkies: Preheat your oven to 350°F (175°C). Once it reaches the desired temperature, place your assembled browkies in the center of the oven. Bake for 25-30 minutes, but keep a close eye on them towards the end of the baking time.
2. Monitoring Baking Time: The size of your pan and the thickness of your layers will affect baking time. It’s essential to check for doneness without opening the oven too frequently, which can lower the temperature.
3. The Toothpick Test: To determine if your browkies are done, insert a toothpick in the center. If it comes out with a few moist crumbs (not wet batter), your browkies are ready. Remember, they will continue to cook slightly after being removed from the oven due to residual heat.
Cooling and Setting: Key to Great Texture
Once your browkies are baked to perfection, the next step is cooling them properly.
1. Cooling Before Slicing: Allow the browkies to cool in the pan on a wire rack for at least 15-20 minutes before attempting to slice them. This cooling period helps the layers set, making it easier to achieve clean edges when cutting.
2. Cooling Methods: If you’re in a hurry, you can speed up the cooling process by transferring the browkies to the fridge after they have cooled at room temperature for a bit. Just be sure not to let them sit too long, as this can alter their texture.
Serving Suggestions: Elevating Your Browkies Experience
Now that your browkies are cooled and cut into squares, it’s time to think about presentation and serving ideas that will elevate your dessert experience.
1. Presentation Ideas: Serve your browkies on a decorative platter or individual dessert plates. Adding a scoop of vanilla ice cream on top creates a delightful contrast in temperature and flavor. The warmth of the browkies combined with the coolness of the ice cream is an indulgent experience.
2. Garnishing: Consider drizzling melted chocolate or caramel sauce over the top for added sweetness and visual appeal. A sprinkle of sea salt can enhance the flavors, providing a sophisticated touch. Fresh berries or mint leaves can also add a pop of color and freshness.
3. Pairing Suggestions: Browkies pair wonderfully with a glass of cold milk or a steaming cup of coffee. The rich flavors of chocolate are complemented by the creaminess of milk, while coffee adds a pleasant bitterness that balances the sweetness.
Storage Tips: Keeping Browkies Fresh
To ensure your browkies maintain their chewy texture and rich flavor, proper storage is essential.
1. Best Practices for Storage: Store your browkies in an airtight container at room temperature for up to 4-5 days. If you want to keep them fresh for a longer period, consider freezing them.
2. Freezing Browkies: To freeze, wrap individual browkies in plastic wrap or aluminum foil and place them in a freezer-safe bag. They can last for up to 3 months in the freezer. When you’re ready to enjoy them, simply thaw at room temperature for a few hours or microwave for a few seconds to regain that fresh-baked softness.
Nutritional Information: Understanding Your Indulgence
While indulging in browkies is a delightful experience, it’s also essential to understand what you’re consuming.
1. Overview of Nutritional Components: Each serving of browkies contains a mix of carbohydrates, fats, and proteins. Typically, a 2-inch square can have around 200-250 calories, depending on the specific ingredients used.
2. Caloric Breakdown: Most of the calories come from sugar and butter, so if you’re looking to enjoy browkies while being health-conscious, consider making adjustments such as using less sugar or substituting some of the butter with applesauce or a healthier fat option.
Conclusion: Indulging in Browkies
Browkies are more than just a dessert; they are a delightful indulgence that combines the best of both worlds—chewy cookies and fudgy brownies. This recipe is perfect for sharing with friends and family or enjoying as a sweet treat after a long day.
We encourage you to try making browkies at home. The process is simple, and the results are incredibly rewarding. Whether you choose to stick with the classic recipe or add your own twist with mix-ins, browkies are sure to become a cherished dessert in your culinary repertoire.
Baking provides not only a delicious outcome but also the joy of creating something special from scratch. Embrace the process, savor your homemade browkies, and share the love with those around you. Happy baking!