

Introduction
Katsu, a beloved dish from Japan, has gained a prominent spot on menus around the world, charming palates with its delightful combination of textures and flavors. Originating from the term “katsuretsu,” which means “cutlet,” Katsu typically involves breaded and deep-fried meat, commonly pork or chicken, served alongside rice and shredded cabbage. This crispy, golden-brown delight is a staple at Japanese restaurants and has also become a favorite comfort food in many households.
In this article, we will focus on crafting crispy Katsu bowls topped with homemade Tonkatsu sauce. The allure of this dish lies not only in its crunchy exterior but also in the harmonious blend of savory flavors that come together with the sauce. It’s an accessible recipe that invites home cooks to explore Japanese cuisine, providing a satisfying meal that can easily be recreated in your own kitchen.
Understanding Katsu: A Japanese Culinary Staple
Katsu is more than just a dish; it is a cultural icon representing Japanese culinary ingenuity. While it has its roots in European cuisine, particularly in the introduction of breaded meats during the Meiji era, Katsu evolved to reflect local tastes and ingredients. Traditionally, Katsu is made from either pork (tonkatsu) or chicken (chicken katsu), and these variations have their own unique appeal.
The most common type, tonkatsu, features boneless pork chops that are pounded for tenderness, seasoned, breaded, and deep-fried until golden. The dish is often served with a side of shredded cabbage, rice, and a drizzle of Tonkatsu sauce, which enhances the flavors significantly. It’s this sauce that elevates Katsu from a simple fried dish to a culinary masterpiece, with its rich and tangy profile complementing the crispy meat beautifully.
Ingredients Overview
To create the perfect crispy Katsu bowls with flavorful Tonkatsu sauce, it’s essential to use quality ingredients that contribute to the overall taste and texture of the dish. Here’s a detailed look at the key components you’ll need:
Boneless Pork Chops
When choosing the pork chops, opt for boneless cuts that are about 1-inch thick. The thickness is crucial as it allows for even cooking—too thin, and they may dry out; too thick, and they may not cook through properly. Look for well-marbled pork chops for added flavor and juiciness.
Seasonings
The beauty of Katsu lies in its simplicity, which is why only a few seasonings are necessary. A sprinkle of salt and freshly cracked black pepper enhances the natural flavors of the pork, ensuring that every bite is savory and satisfying. Seasoning the meat properly before breading is key to a delicious end result.
Breading Ingredients
The breading is what gives Katsu its signature crunch. For this, you’ll need three main components:
– Flour: All-purpose flour helps the egg adhere to the meat, creating a base layer for the breadcrumbs.
– Egg: Beaten eggs provide moisture and act as a binding agent, ensuring the panko breadcrumbs stick well to the pork.
– Panko Breadcrumbs: Unlike traditional breadcrumbs, panko is coarser and results in a lighter, crispier texture when fried. It’s this unique texture that makes Katsu so delightful.
Vegetable Oil
For frying the Katsu, choose a neutral vegetable oil, such as canola or sunflower oil, as they have high smoke points and won’t interfere with the flavor of the dish. The oil needs to be heated to the right temperature—around 350°F (175°C)—to achieve that golden crispiness. A deep fryer or a heavy-bottomed pan works well for frying, ensuring that the oil maintains a consistent temperature.
Accompaniments
A well-rounded Katsu bowl includes more than just the meat. Here are the essential accompaniments that elevate the dish:
– Steamed White Rice: This serves as a hearty base for the Katsu. Short-grain Japanese rice is preferred for its sticky texture, which pairs well with the sauce.
– Shredded Cabbage: Freshly shredded cabbage adds a refreshing crunch that contrasts beautifully with the crispy Katsu.
– Green Onions: Finely chopped green onions provide a mild onion flavor and a splash of color to your bowl.
– Sesame Seeds: Toasted sesame seeds add a nutty flavor and a bit of elegance to the dish.
Making the Tonkatsu Sauce
The star of the Katsu bowl is undoubtedly the Tonkatsu sauce, a rich and savory condiment that enhances the flavors of the fried pork. Making this sauce at home is simple and rewarding. Here’s a step-by-step guide to preparing it:
Ingredients for Tonkatsu Sauce
1. Worcestershire Sauce: This adds a complex depth of flavor with its tangy and slightly sweet profile.
2. Ketchup: A staple in many households, ketchup contributes sweetness and a hint of acidity to the sauce.
3. Soy Sauce: This salty element enhances the umami flavor, rounding out the sauce’s profile.
4. Mirin: A sweet rice wine that adds a touch of sweetness and depth.
5. Sugar: Balances the acidity of the other ingredients, making the sauce smoother.
6. Mustard: A dash of mustard brings in a slight kick, enhancing the overall flavor.
Step-by-Step Guide to Preparing Tonkatsu Sauce
1. Combine Ingredients: In a small bowl, mix together 1/4 cup of Worcestershire sauce, 1/4 cup of ketchup, 2 tablespoons of soy sauce, 2 tablespoons of mirin, 1 tablespoon of sugar, and 1 teaspoon of mustard.
2. Whisk Until Smooth: Use a whisk to blend all the ingredients thoroughly until the sugar is dissolved and the sauce is smooth.
3. Taste and Adjust: Sample the sauce and adjust according to your preferences. If you like it sweeter, add more sugar; for added tanginess, increase the Worcestershire sauce or ketchup.
4. Store: The sauce can be made ahead of time and stored in the refrigerator for up to two weeks, making it a convenient addition to various dishes.
With this flavorful Tonkatsu sauce prepared, you’re well on your way to creating an unforgettable Katsu bowl experience.
Preparing the Pork Chops
Now that you have your ingredients ready, it’s time to prepare the pork chops for frying. Here’s how to ensure they turn out perfectly crispy and delicious.
1. Pound the Pork: Place the boneless pork chops between two pieces of plastic wrap or parchment paper. Using a meat mallet, gently pound the chops to an even thickness of about 1 inch. This not only tenderizes the meat but also promotes even cooking.
2. Season: Generously season both sides of the pork chops with salt and pepper. This step is crucial as it infuses the meat with flavor before the breading is applied.
3. Set Up Your Breading Station: Prepare a breading station by placing three shallow bowls in a row. Fill the first bowl with flour, the second with beaten eggs, and the third with panko breadcrumbs.
4. Coat the Pork: Start by dredging each pork chop in flour, shaking off any excess. Next, dip it into the beaten eggs, ensuring it’s fully coated. Finally, press the chop into the panko breadcrumbs, covering it completely. Gently press the breadcrumbs onto the meat to help them adhere.
5. Let It Rest: Once breaded, place the pork chops on a wire rack or a plate and let them rest for about 10-15 minutes. This resting period allows the breading to set, ensuring a crispier finish when fried.
This preparation stage is essential to achieving the perfect Katsu. The combination of flavorful seasoned pork, a crunchy exterior, and the tangy Tonkatsu sauce will undoubtedly make your Katsu bowls a hit at the dinner table.
In the next part of the article, we will delve into the frying process and how to assemble your delicious Katsu bowls, creating a beautiful presentation that is sure to impress your family and friends. Stay tuned for the continuation of this flavorful journey into the heart of Japanese cuisine.
Importance of Drying the Pork Chops Before Seasoning
Before diving into the preparation of your Crispy Katsu Bowls, it’s crucial to start with properly dried pork chops. Excess moisture on the surface of the meat can hinder the seasoning from adhering effectively and lead to a soggy breading during frying. To achieve that coveted crispy texture, pat the pork chops dry with paper towels before seasoning. This simple yet vital step ensures that the breading will cling to the meat, resulting in a beautifully crispy exterior once fried.
Detailed Instructions on Seasoning and Preparing the Breading Station
Now that your pork chops are dry, it’s time to season them. Start by generously seasoning both sides of each chop with salt and pepper. This basic seasoning enhances the natural flavors of the pork and sets the foundation for the overall dish.
Next, prepare your breading station, which consists of three shallow dishes:
1. Flour: Place all-purpose flour in the first dish. You can season the flour lightly with salt and pepper for added flavor.
2. Egg Wash: In the second dish, beat a couple of eggs until well combined. This will help the breadcrumbs stick to the pork.
3. Panko Breadcrumbs: Finally, pour panko breadcrumbs into the third dish. Panko provides a light and airy crunch that traditional breadcrumbs lack.
To ensure an even coating, follow these steps:
1. Coat in Flour: Take one pork chop and coat it evenly in the flour, shaking off any excess. This initial layer provides a dry surface for the egg to adhere to.
2. Dip in Egg Wash: Next, dip the floured chop into the egg wash, ensuring it’s fully coated. Allow any excess egg to drip off.
3. Crust with Panko: Finally, roll the chop in the panko breadcrumbs, pressing gently to help the crumbs adhere. Make sure the entire surface is covered with a thick layer of panko for maximum crunch.
Repeat this process for all pork chops, then set them aside on a rack or plate to rest while you prepare for frying.
The Frying Process
Frying the pork chops is where the magic happens. To achieve the perfect crunch, follow these guidelines:
Comprehensive Guide to Frying the Pork Chops
1. Heat the Oil: In a large, deep skillet or frying pan, add enough vegetable oil to submerge the pork chops about halfway. Heat the oil over medium-high heat. You want the oil hot enough that it bubbles when a breadcrumb is added. This usually means heating it to about 350°F (175°C).
2. Temperature Control: Maintaining the right temperature during frying is crucial. If the oil is too hot, the breadcrumbs will burn before the pork is cooked through. If it’s too cool, the pork will absorb excess oil, leading to a greasy finish. To test the oil, drop a small piece of bread into the oil; if it sizzles and turns golden brown in about 60 seconds, you’re ready to fry.
3. Fry the Pork Chops: Carefully add the breaded pork chops to the hot oil, taking care not to overcrowd the pan. Fry each chop for about 4-5 minutes on each side, depending on thickness. The goal is to achieve a golden-brown crust while ensuring the pork is cooked through.
Visual Cues for Knowing When the Pork is Perfectly Cooked
To verify that the pork is cooked through, use a meat thermometer; the internal temperature should reach 145°F (63°C). Alternatively, you can cut into the thickest part of the chop to check for any pinkness—there should be none. When done, the pork should be juicy but not raw, with a perfectly golden-brown crust.
Tips on Draining Excess Oil for a Less Greasy Finish
Once the pork chops are cooked, remove them from the oil and place them on a wire rack set over a baking sheet or on a plate lined with paper towels. This allows excess oil to drain away, ensuring a crisp finish without greasiness. Avoid letting them sit in the oil or on a flat surface, as they can become soggy.
Assembling the Katsu Bowls
Now that your pork is perfectly fried, it’s time to assemble your Katsu bowls. This step is crucial not only for taste but also for presentation.
Step-by-Step Guide to Assembling the Katsu Bowls
1. Start with the Rice: Begin by placing a generous serving of steamed white rice at the bottom of each bowl. This will serve as the base.
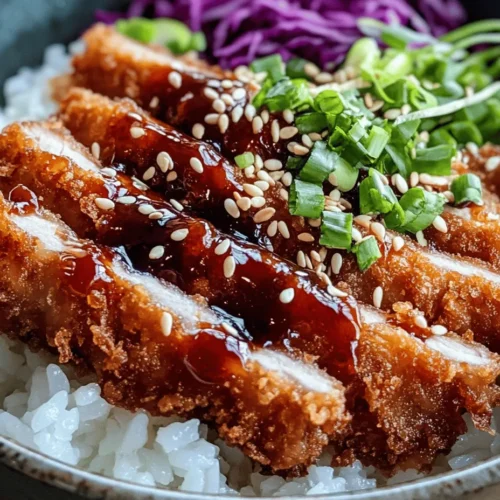
2. Layer the Cabbage: Next, add a handful of finely shredded cabbage on top of the rice. The crunch of the cabbage adds texture and freshness to the dish, balancing the richness of the fried pork.
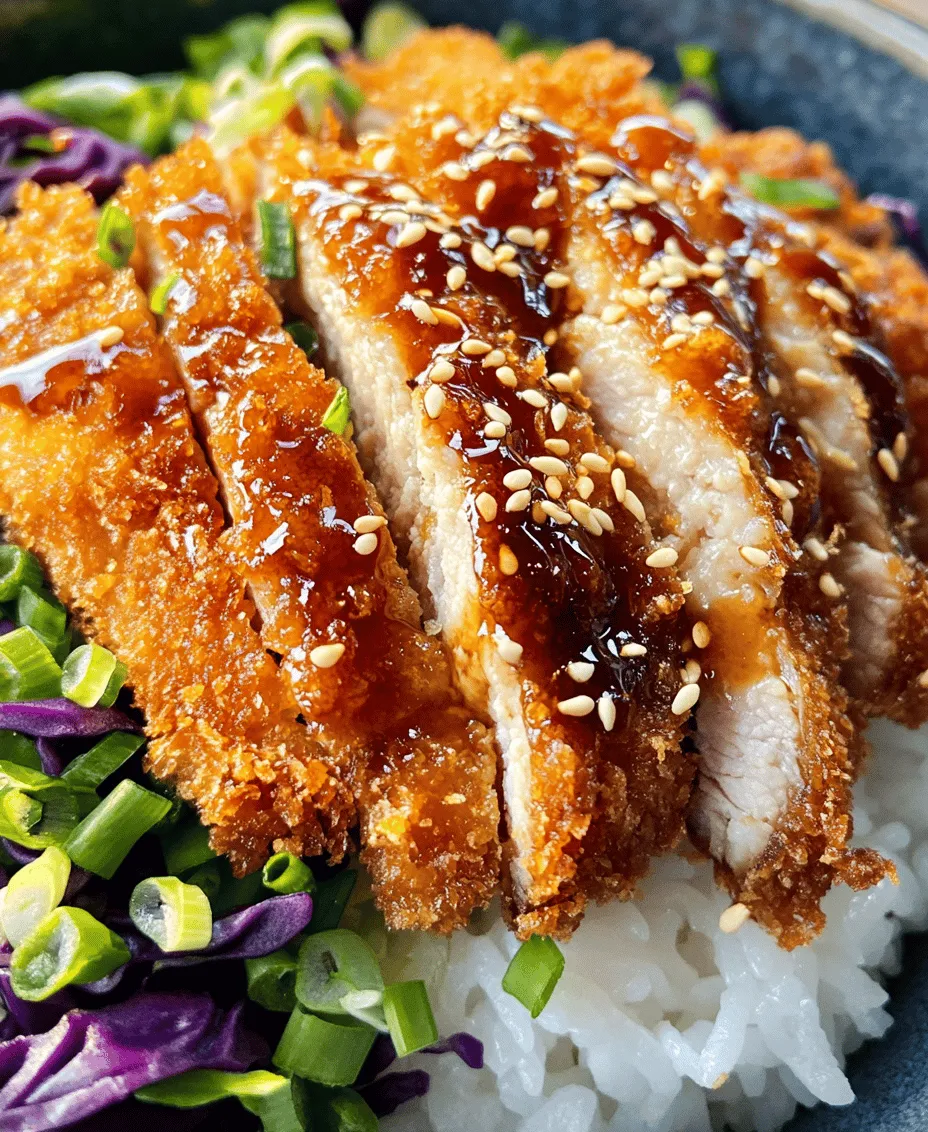
3. Add the Pork Chops: Slice the fried pork chops into strips and arrange them neatly over the cabbage. The slices should be laid in a fan shape to enhance the visual appeal of the dish.
Importance of Presentation: How to Create an Appealing Dish
Presentation is key when assembling your Katsu bowls. Consider using colorful ingredients and arranging them neatly. A sprinkle of sesame seeds or finely chopped green onions can add a pop of color, while a wedge of lemon or lime can add freshness. The visual appeal of your dish can enhance the overall dining experience.
Drizzling Sauce: How Much is Too Much?
When it comes to drizzling the Tonkatsu sauce over the pork, moderation is essential. Aim for a light drizzle that enhances the flavor without overwhelming the dish. You want the sauce to complement the pork rather than drown it. A few spoonfuls should be sufficient, and you can always serve extra sauce on the side for those who prefer more.
Serving Suggestions
Crispy Katsu Bowls are delicious on their own, but you can elevate the experience with a few thoughtful serving suggestions.
Ideas for Garnishing and Enhancing the Bowl Experience
Garnish your Katsu bowls with fresh herbs such as cilantro or parsley to add a burst of flavor. Additionally, consider topping the dish with a sprinkle of furikake—a Japanese seasoning blend that can enhance both flavor and presentation.
Pairing Options: Suggested Side Dishes or Beverages
For a complete meal, pair your Katsu bowls with a side of miso soup, edamame, or a simple seaweed salad. As for beverages, a chilled glass of Japanese iced tea or a light beer can complement the flavors beautifully.
Seasonal Variations: How to Incorporate Seasonal Vegetables or Flavors
Feel free to adapt your Katsu bowls with seasonal vegetables. In the spring, consider adding fresh asparagus or peas; in the fall, roasted sweet potatoes or brussels sprouts can provide a delightful contrast to the crispy pork. The versatility of this dish allows you to experiment and tailor it to your taste preferences and seasonal availability.
Conclusion
In summary, making Crispy Katsu Bowls with Flavorful Tonkatsu Sauce is a delightful culinary adventure that’s both satisfying and simple. With its layers of flavor and texture—from the crispy pork and fresh cabbage to the comforting rice—this dish is sure to impress family and friends alike.
I encourage you to experiment with this recipe, making it your own. Don’t hesitate to try different vegetables, sauces, or side dishes; the possibilities are endless! Cooking is not just about following recipes—it’s about discovering joy in the kitchen and sharing delicious meals with loved ones. So grab your ingredients, roll up your sleeves, and enjoy the process of creating something truly special. Happy cooking!